| |||
Thanks to Dan LaValley of Learning Technology & Distance Education for creating this tutorial.
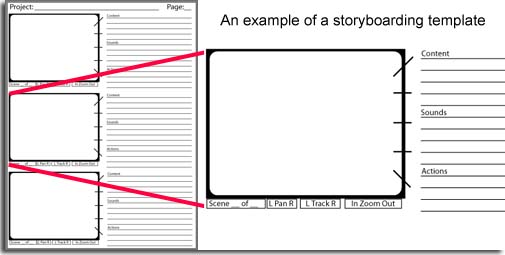
Storyboarding
The more you can plan out what you need and want ahead of time, the better quality video you'll get. Storyboarding can range all the way from drawing out each scene with framing information and dialogue to just writing down your vision of the shoot. Storyboards are typically a series of sketches, similar to a comic strip, which outline the action and dialogue in a scene. While this may not be necessary for taping someone at a podium in a lecture hall, the idea is to think about what you want out of your shoot before you look through the camera.
Pay Attention to Lighting If your audience can't see your subject (and this refers to over and under exposure), you'll lose their interest quickly and the video will compress especially badly. When compressed, video that is too dark or light will lose most of the detail. Here are a few things to consider to help combat bad lighting:
If it is absolutely impossible to change your lighting, there are certain camera settings that might improve the poor lighting conditions. If you have a subject that is backlit, you may wish to use the exposure lock. 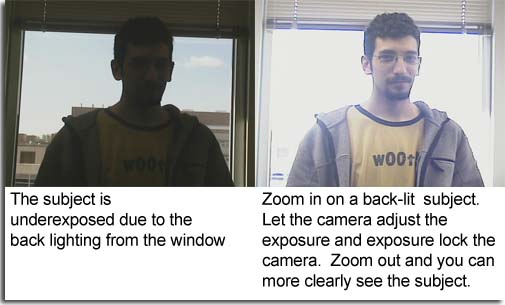 To do so, zoom in the camera to the subject's face and wait for the lighting to adjust. Then press the exposure lock button. This will lock the settings on the camera at that exposure level so when you zoom back out, it won't readjust itself to take account of the lighting from the back. Please note though that this will overexpose your background, often making it pure white light. 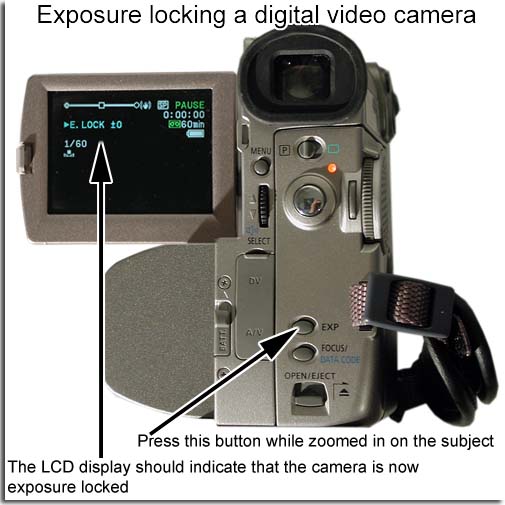 Shutter Speed You can also slow down the shutter speed. In doing so, the shutter is open for a longer amount of time and it lets in more light. The disadvantage of a slow shutter speed is that because lens open for a longer amount of time, it will capture more motion blur if the subject is moving quickly. Note that you can not change the shutter speed of a camera if it is exposure locked.  The Advantage of Using Lighting Kits 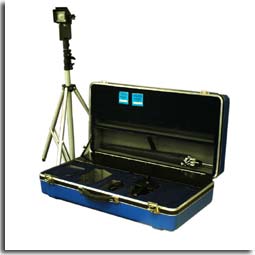 Lastly, consider using a lighting kit. They add to the equipment you need to carry but significantly increase the quality and professional look of your video. The three basic lights to remember are: key light, fill light, and back light. Key light is the main light source on your subject and should be the source of the greatest amount of light. Keep this light about two times as bright as the fill light on your subject. The key light lights up your subject's face and allows you to see their eyes - which is important for most instructional uses of video. Back Light is a separation light. It separates your subject from the background and adds depth to your video. Lastly, consider using a lighting kit. They add to the equipment you need to carry but significantly increase the quality and professional look of your video. The three basic lights to remember are: key light, fill light, and back light. Key light is the main light source on your subject and should be the source of the greatest amount of light. Keep this light about two times as bright as the fill light on your subject. The key light lights up your subject's face and allows you to see their eyes - which is important for most instructional uses of video. Back Light is a separation light. It separates your subject from the background and adds depth to your video.
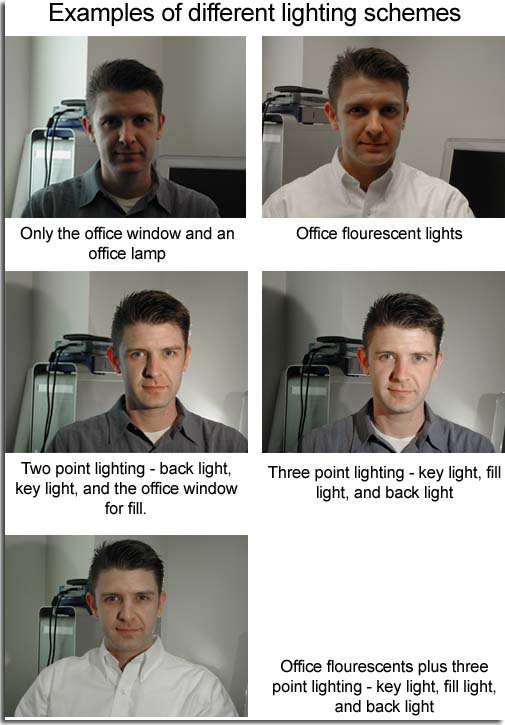 Placement of the light is dependent on the your personal aesthetics, program and location demands. However, the diagram below depicts basic placement.  With the development of more and more sensitive electronic cameras we are seeing less use of the fill light as a third element in the setup for a single individual. Cameras see into the shadows so well that the key light is enough to fill the negative side of the subject and the back separation light tends to add readable fill up over the top of the subject . Some of the information you've read on lighting is from a web page by Bill Fletcher. Simplify the Background For most instructional use of video, you want to make sure that the subject of your video is clearly conveyed and focused. You can help the viewer by simplifying the background. A noisy background of say, a busy street will be distracting to the viewer. In addition, any motion in the frame makes the video harder to compress. If the compressor can largely ignore the background (due to a flat or blurred background), it can provide a clearer foreground subject with more detail. Some techniques for simplifying the background are to shoot your subject against the sky or a grassy background. Consumer camcorders also have a portrait mode where depth of field can be used to blur the background if you have your subject relatively close to the camera.
Crop the Subject - Get Close One thing to keep in mind for computer based video, especially video that you are shooting with the intent to stream it, is that the frame size is typically smaller than what most people are used to when watching video. Video that was composed to look good on a TV will not necessarily look good when it is compressed because of the smaller frame size.
To combat this, compose your shots so that your subject takes up more of the frame and is closer to the camera. Creating a tighter frame can also offset some lighting problems. Skin doesn't wash-out on close-ups unless the lighting is really hot, and tighter frames can show more detail especially in low-light situations.
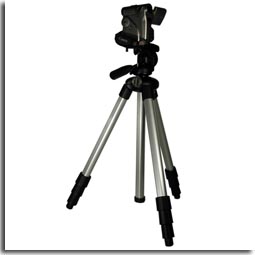
Use a Tripod
Avoid Excessive Panning AND ZOOMING Panning and zooming can be distracting even though the camera operator is usually doing it to follow or focus on a subject. If you know you are taping a moving subject as in a lecture hall - the ideal is to have a multi-camera set up. If you do not have a multi-camera set up but want to get different shots and have the time - instead of panning and zooming try picking up the camera with the tripod and moving it to a different location to get your second or third shot. The general rule of thumb for panning and zooming is that a shot should pan once or zoom in or out once - not back and forth. It is usually better if possible to cut between a well composed pan and stills of a subject rather than constantly pan back and forth or zooming in and out.
Using Other Manual Controls Naturally, this only applies if you have manual controls on your camera. Even the most low-end cameras should allow the following:
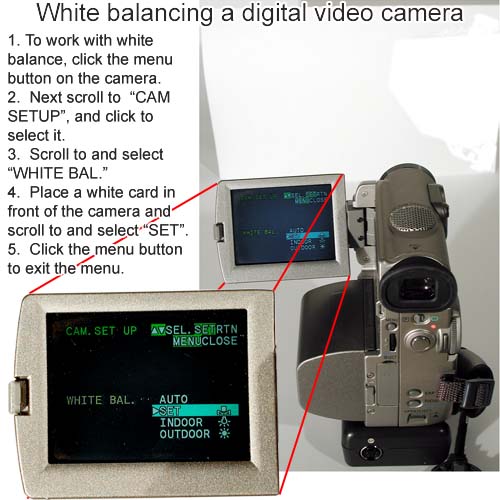
Manual focus is better than auto-focus especially in low-light situations. Even the slightest change of depth by the subject matter can force an adjustment by the lens when it is in auto focus mode. This softens the image momentarily and will come out even worse in compression. Low-light situations are bad for auto because the lens can have problems distinguishing the foreground from the background and it will constantly be trying to adjust - coming in and out of focus. If you have a tripod and only one stationary subject, you should always use manual focus. To manually focus on a subject, just point the camera at the subject until it is in focus and then hit the "Focus" button. Manual white balance is better than auto white balance. White balancing is typically done by placing a white card in front of the camera where the subject is and pressing a "white balance" button on the camera or in the LCD menu. With a manual balance you are taking a more accurate reading of the existing light and color temperature because you are reading it off the white card. Auto white balance reads color off of whatever light is coming into the lens from the existing environment. If you have time, compare the manual controls to the auto controls before you need to start shooting. To white balance one of the BNMC's cameras, click the "Menu" button on the back of the camera. Scroll to and select "CAM SETUP". Scroll to and select "WHITE BAL.". Place a piece of white paper in front of the camera. Change the white balance option from "Auto" to manual (the SET function on our cameras). The menu will momentarily flash "SET" white it white balances the camera. When it is done flashing, press the menu button again to exit the menu.
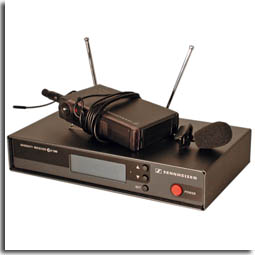
Use an External or Wireless Microphone
| |||